1. Ensure that DIP switch 1 is turned to the left and DIP switch 2 is turned to the right.
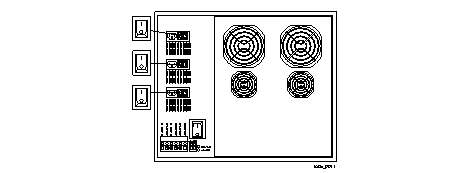
2. Ensure that the power switches for the AC and DC versions of the PortMaster 4 are turned off (Figure 3-1 and Figure 3-2).
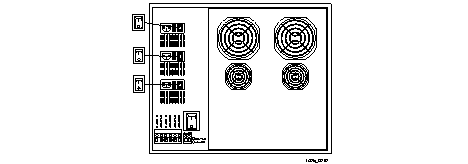
 DC Power Switch
3. If you are using AC power on the PortMaster 4, connect an active power source to each installed power supply unit.
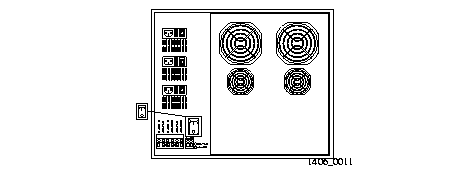
For each power supply, connect a power cord to the appropriate power receptacle (Figure 3-3) and to a properly grounded electrical outlet.
Figure 3-3 Three AC Power Receptacles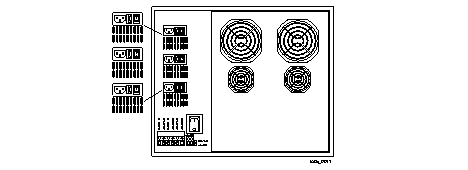
The AC power sources supply approximately 80W to each slot in the PortMaster 4.
4. If you are using the single-feed DC version of the PortMaster 4, connect an active power source as follows (see Figure 3-4):
a. Connect a -48VDC A line to the -48VDC A rightmost terminal block.
b. Connect a 0VDC A line to the 0VDC A leftmost terminal block.
c. Connect the two -48VDC B and 0VDC B inputs together using the provided jumpers.
d. Connect a ground line to the grounding screw.
Figure 3-4 DC Power Receptacles with Jumpers for Single Power Feed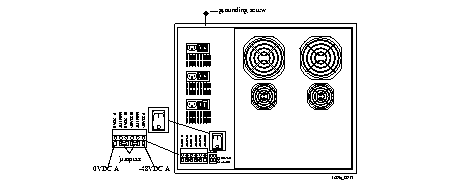
The DC power sources supply approximately 80W to each slot in the PortMaster 4.
5. If you are using the double-feed DC version of the PortMaster 4, connect an active power source as follows (see Figure 3-5):
a. Connect a -48VDC A line to the -48VDC A (rightmost) terminal block.
b. Connect a 0VDC A line to the 0VDC A (leftmost) terminal block.
c. Connect a -48VDC B line to the -48VDC B (center right) terminal block.
d. Connect a 0VDC B line to the 0VDC B (center left) terminal block.
e. Connect a ground line to the grounding screw.
Figure 3-5 DC Power Receptors for DC Double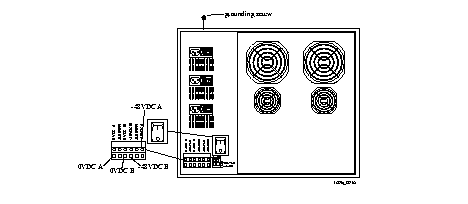 Power Feed
The DC power sources supply approximately 80W to each slot in the PortMaster 4.
6. Turn the power on (Figure 3-6 and Figure 3-7).

The startup sequence on a PortMaster 4 proceeds as follows. (See "Observing Boot Messages" on page 4-3 for a description of startup messages that appear on the console):
a. The manager module starts up.
b. The PortMaster 4 performs a file system check of the directories in the nonvolatile RAM of the manager module.
c. The manager board creates permanent virtual circuits (PVCs) across the ATM network to the other installed boards and starts them up. If insufficient power is available to start up all installed boards, the manager module turns on only as many boards as the power budget can handle, beginning with the lowest-numbered slots.
d. The installed boards load any configuration files that are in their respective directories in the manager board's nonvolatile RAM. If no configuration is found, the boards download default configurations from the manager board.
7. Verify that the green POWER LED on the rear panel of the PortMaster 4 is solidly lit.
Note ¯ ![]() When a power malfunction occurs in the PortMaster 4, the amber ALARM LED on the rear panel is solidly lit.
When a power malfunction occurs in the PortMaster 4, the amber ALARM LED on the rear panel is solidly lit.
8. On the front of the PortMaster 4, verify that the amber LED and green LED are lit on each installed AC power supply.
The amber LED lights when AC power is applied to the unit, and the green LED lights when the unit detects proper -48VDC power on the output of the supply.
9. On the front of the PortMaster 4, verify that the PWR LED is lit on the manager module and all installed line boards.
The PWR LED is located at the bottom of an installed module or board.
10. Verify the following on the manager module:
a. The DIAG LED blinks three times per second during the startup sequence and then stays solidly lit with a 1-second interruption every 5 seconds.
DIAG LED behavior might vary, depending on the version of ComOS.
b. The green link LEDs are solidly lit for each Ethernet connection.
Locate the link LEDs next to the RJ-45 10BaseT and 10/100BaseT Ethernet ports.
c. The amber network LED for each Ethernet connection blinks when Ethernet traffic is present.
Locate the network LEDs next to each RJ-45 Ethernet port.
Note ¯ ![]() Heavy traffic can cause the network LED to blink so rapidly that it appears to be solidly lit.
Heavy traffic can cause the network LED to blink so rapidly that it appears to be solidly lit.